
Collection planner
Art Gallery donation checklist
Track all 28 paintings and their 168 item requirements. Record quantities already given to the attendant; items still in your bag are not donated yet.
Red Room needs the purple Void-quality icon. Other rooms accept any quality where applicable. Pickles, Jelly, and Wine accept any variety. An aging stage such as Artisan or Perfect is separate from the quality icon.
0 / 28 paintings completed · 0 / 168 item requirements completed
Showing 28 / 28 paintings. Remaining items below follow these filters.
Remaining items for this view · 168 distinct entries
Matching item names are combined only when their quality and variety rules match. Ordinary and Void-quality requirements remain separate.
Blue Room
0 / 4 paintings completed
Painting 1 — Crab Pot0 / 6 donated
Painting 2 — Seasonal Lakefront Fish0 / 6 donated
Painting 3 — Seasonal Campsite Fish0 / 6 donated
Painting 4 — Rare Fish0 / 6 donated
Yellow Room
0 / 6 paintings completed
Painting 1 — Husbandry Gathering0 / 6 donated
Painting 2 — Preserving Barrel and Keg0 / 6 donated
Painting 3 — Drying Rack0 / 6 donated
Painting 4 — Tree Fruits and Tree Seeds0 / 6 donated
Painting 5 — Food0 / 6 donated
Painting 6 — Food0 / 6 donated
Green Room
0 / 4 paintings completed
Painting 1 — Rebirth0 / 6 donated
Painting 2 — Harvest0 / 6 donated
Painting 3 — Witch0 / 6 donated
Painting 4 — Death0 / 6 donated
Purple Room
0 / 4 paintings completed
Painting 1 — Seasonal Gatherables0 / 6 donated
Painting 2 — Mushrooms0 / 6 donated
Painting 3 — Mining Bars0 / 6 donated
Painting 4 — Complex Mining Bars0 / 6 donated
Orange Room
0 / 6 paintings completed
Painting 1 — Body Parts0 / 6 donated
Painting 2 — Unique Enemy Drops0 / 6 donated
Painting 3 — Unique Event Drops0 / 6 donated
Painting 4 — Cursed Drops0 / 6 donated
Painting 5 — Bugs0 / 6 donated
Painting 6 — Skull0 / 6 donated
Red Room
0 / 4 paintings completed
Painting 1 — Fish0 / 6 donated
Painting 2 — Farming0 / 6 donated
Painting 3 — Husbandry0 / 6 donated
Painting 4 — Aged0 / 6 donated
Donation notes are saved in this browser. They do not read or change your game save. The article below explains item routes, recipes, processing, and quality checks.
Complete paintings across all six Gallery rooms
The Art Gallery is in northwestern Town. Give the attendant the requested items to restore its paintings. The collection spans six rooms and 28 paintings, covering fishing, farming, husbandry, processing, forage, mining, unusual encounters, and exact-quality products.
You can submit items over multiple visits. Most paintings accept any available quality of the requested item. The Red Room is different: every requested item must carry the purple Void-quality icon. A normal-quality version with the right name does not complete a Red Room requirement.
The checklists below include every painting and all six requested items in each. Read the quantities carefully: Yellow Room painting 1 and Orange Room painting 5 need five of each listed item, while the Purple Room mining paintings use several different stack sizes.
Floors, room positions, and milestone rewards
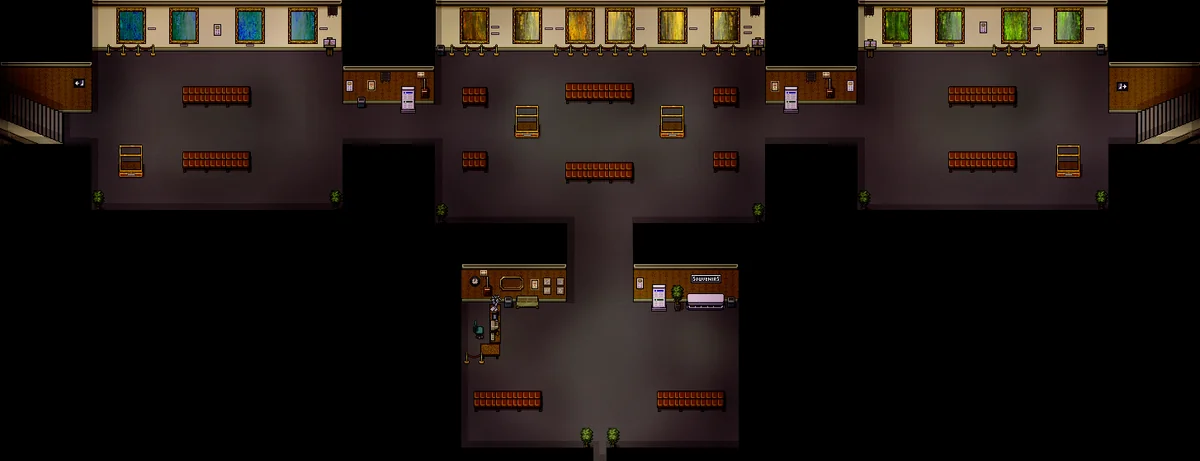
| Room | Location | Painting count | Milestone rewards |
|---|---|---|---|
| Blue | First floor, left | 4 | All four: Fish Finder |
| Yellow | First floor, center | 6 | Three: Feathered Cap +5; all six: Teleporter |
| Green | First floor, right | 4 | All four: Totem of Cultivation |
| Purple | Second floor, left | 4 | All four: Ring of Plenty +8 |
| Orange | Second floor, center | 6 | Three: Totem of Calling; all six: Slayer's Ring +8 |
| Red | Second floor, right | 4 | All four: Kitchen rack |
The partial milestones in Yellow and Orange can be reached before finishing their entire rooms. This matters when the remaining paintings depend on a long processing chain or deeper exploration. Completing three accessible paintings is still a useful collection objective.
Check a painting's actual remaining requests rather than counting the number of items you brought. Several rooms use the same broad activity but different names, quantities, or quality requirements. A fish accepted in Blue may still need a separate Void-quality copy in Red.
Quality, variety, and intermediate products
Outside the Red Room, items with a quality tier generally accept Normal, Silver, Gold, or Void. Items without that tier system have no quality icon requirement. Any variety applies to the Pickles, Jelly, and Wine families in Yellow Room painting 2: you need a product in the named family, rather than one particular displayed flavor.
For processed products, bring the finished item. Wet herb bundles and raw meat preparations are inputs, while the Yellow Room asks for dry bundles and finished meat. Cheese is also a different item from the Milk used to produce it.
For Red Room aged products, there are two separate checks. The product name identifies an aging stage, such as Artisan or Perfect. The purple icon identifies Void quality. An Artisan aging stage does not by itself turn an ordinary item into Void quality.
Blue Room fishing checklist
The first-floor left room combines crab-pot catches, seasonal Lakefront fish, seasonal Campsite fish, and fish obtained in more specialized locations. Each of its 24 entries needs one item, and any quality is accepted.
| Painting | Full item checklist | Quantity rule |
|---|---|---|
| 1 — Crab Pot | Mud Snail × 1; Starfish × 1; Spiked Clam × 1; Hermit Crab × 1; Lake Mollusk × 1; Stoneshell Crab × 1 | Any quality where applicable; exact named item |
| 2 — Seasonal Lakefront Fish | Lake Screamer × 1; Midnight Crayfish × 1; Glowfish × 1; Blood Carp × 1; Bottom-Feeder × 1; Dust Crab × 1 | Any quality where applicable; exact named item |
| 3 — Seasonal Campsite Fish | Stoneshell Turtle × 1; Koi Fish × 1; Gold Sturgeon × 1; Blerpfish × 1; Manefish × 1; Void-Floater × 1 | Any quality where applicable; exact named item |
| 4 — Rare Fish | Rot Puffer × 1; Stalktopus × 1; Ashball × 1; Ancient Manta × 1; Aetherfin × 1; Ancient Angler × 1 | Any quality where applicable; exact named item |
Crab pots and the seasonal Lakefront catches
For painting 1, bait a Crab Pot in outdoor water at the Lakefront and check it the next day. Its six requested catches are different items. Bringing multiple Mud Snails does not substitute for a missing Stoneshell Crab or Spiked Clam.
For painting 2, use the Old Fishing Rod with the relevant bait and pay attention to both time and season. Lake Screamer is a daytime catch in Rebirth or Harvest; Midnight Crayfish is a nighttime catch in Rebirth or Death; Glowfish is nighttime in Harvest or Witch. Those three use Worm or Leech bait in their listed routes.
Blood Carp is a nighttime Witch or Death catch using Worm bait. Bottom-Feeder is available during Harvest at either time with Worm or Leech. Dust Crab is a daytime Witch catch with Worm bait. Keeping their names and conditions together is more useful than treating every missing fish as another attempt in the same water at the same time.
Campsite and rare-fish destinations
Painting 3 uses Campsite catches with a Sturdy Fishing Rod and Dragonfly bait. Stoneshell Turtle is nighttime in Rebirth or Death and also has a Lakefront Crab Pot route. Koi Fish is daytime in Witch or Death. Gold Sturgeon and Manefish are daytime in Rebirth or Harvest; Blerpfish is nighttime in Harvest or Witch; Void-Floater is nighttime in Witch or Death.
Painting 4 moves beyond one ordinary fishing location. Rot Puffer has a Sewers route with an Old Fishing Rod and Maggot. Stalktopus has a Mall route with an Old Fishing Rod and Bug. Ashball can be caught at Lakefront or Campsite; the listed Lakefront route uses Leech bait.
Ancient Manta is tied to the Campsite Fishing Contest, using a Sturdy Fishing Rod and Lugworm. Aetherfin has a Campsite route using Sturdy and Dragonfly. Ancient Angler uses a Quality Fishing Rod and Firefly in the Catacombs. These route differences explain why an Old Rod trip to the Lakefront cannot complete every Blue painting.
Yellow Room husbandry and processing checklist
The first-floor center room has six paintings. The first needs five of each husbandry product; the other five need one of each named product. Its three-painting milestone is the Feathered Cap +5, and the six-painting milestone is the Teleporter.
| Painting | Full item checklist | Quantity rule |
|---|---|---|
| 1 — Husbandry Gathering | Honey × 5; Large Milk × 5; Large Egg × 5; Cloudberry × 5; Large Goat Milk × 5; Bat Guano × 5 | Any quality where applicable; exact named item |
| 2 — Preserving Barrel and Keg | Pickles × 1; Jelly × 1; Wine × 1; Honey Mead × 1; Gloom Ale × 1; Secret Sauce × 1 | Any quality where applicable; exact named item |
| 3 — Drying Rack | Spiced Jerky × 1; Spiced Sausage × 1; Cured Spiced Steak × 1; Basic Herb Bundle × 1; Potent Herb Bundle × 1; Rawhide × 1 | Any quality where applicable; exact named item |
| 4 — Tree Fruits and Tree Seeds | Spiralberry × 1; Fingerfruit × 1; Void Plum × 1; Tentacle × 1; Hardwood Seed × 1; Spiritwood Seed × 1 | Any quality where applicable; exact named item |
| 5 — Food | Harvest Stew × 1; Fish Taco × 1; Slayer's Feast × 1; Rancher's Meal × 1; Hunter's Meal × 1; Angler's Meal × 1 | Any quality where applicable; exact named item |
| 6 — Food | Soothing Soup × 1; Protein Shake × 1; Fruit Salad × 1; Filling Platter × 1; Super Stew × 1; Healthy Platter × 1 | Any quality where applicable; exact named item |
Animal products and artisan machines
For painting 1, Large Milk comes from affectionate Tentacows, Large Eggs from affectionate Crows, Cloudberries from affectionate Tall Men, and Large Goat Milk from affectionate Goats. Save the large milk or egg version requested by the checklist; the ordinary product name is not the same item.
Honey can come from Honey Trees in the Old Woods or Bee Boxes. Bat Guano comes from Bat Boxes, rather than defeating bat-shaped enemies. Use the bats and Bat Box guide for that production objective. You need five Guano for this painting, so one collected copy is only part of its requirement.
For painting 2, vegetables processed in a Preserving Barrel provide Pickles, and fruits provide Jelly. A Keg produces Wine from fruit, Honey Mead from Honey, and Gloom Ale from Gloom Hops. Secret Sauce uses an Eyeball in a Grinder. These six entries are finished products from three different processing systems.
Drying products and the tree painting
Painting 3 is a complete Drying Rack collection. The Prep Table prepares the raw meat, wet bundles, and Thick Hide; the rack finishes the six requested outputs. Normal processing takes ten days, with seven days in the Farmhouse Basement.
Painting 4 needs four tree harvests and two actual tree seeds. The fruit-tree route for Spiralberry, Fingerfruit, Void Plum, and Tentacle uses the matching Nursery seed planted on Farm or Ranch grass. The listed wait is 28 days to the first harvest and seven days between later harvests.
A regular acquisition route for Hardwood Seed and Spiritwood Seed is not established here. Keep either if you obtain it, but do not assume that chopping a particular tree will certainly supply these two collection items. This limitation can block painting 4 even when all four tree fruits are ready.
Two separate food paintings
Painting 5 uses Cooking Pot dishes. Harvest Stew needs Corn, Pumpkin, Red Mushroom, Bitter Herb, Cooked Meat, and Ghost Flounder. Fish Taco uses Stalktopus, Bread, Radish, and Salt; its recipe is gained by talking to Edwin near the Notice Board. Rancher's Meal has a recipe from A Balanced Breakfast, while Hunter's Meal also depends on recipe access through tasks.
Painting 6 mixes stations. Soothing Soup, Filling Platter, Super Stew, and Healthy Platter use the Oven associated with the second house upgrade. Protein Shake uses the Juicer from the first upgrade. Fruit Salad is a Cooking Pot recipe requiring its recipe access.
Super Stew additionally needs the Slicer. Do not interpret a missing dish as a need to collect another common vegetable before checking the station and recipe requirements. The requested food still has to be cooked; delivering its ingredients does not complete its row.
Green Room crop checklist
The first-floor right room uses four crop-themed paintings, each requiring one of its six entries. The painting labels organize the collection; check each seed's own planting description when planning a farm. A painting's seasonal name is not a rule that every listed crop can only be grown in that season.
| Painting | Full item checklist | Quantity rule |
|---|---|---|
| 1 — Rebirth | Wheat × 1; Radish × 1; Celery × 1; Worm × 1; Bean × 1; Voidberry × 1 | Any quality where applicable; exact named item |
| 2 — Harvest | Grapes × 1; Coffee Bean × 1; Strawberry × 1; Tomato × 1; Dread Pepper × 1; Watermelon × 1 | Any quality where applicable; exact named item |
| 3 — Witch | Pumpkin × 1; Corn × 1; Devilberries × 1; Squash × 1; Gloom Hops × 1; Peas × 1 | Any quality where applicable; exact named item |
| 4 — Death | Tooth × 1; Ghostberries × 1; Deathleaf × 1; Leadleaf × 1; Eyeball × 1; Soulfruit × 1 | Any quality where applicable; exact named item |
Several crops depend on seed access through tasks. Grapes are associated with Childhood Fear, Coffee Bean with Meet Sophia, Strawberry with The Best Medicine, and Gloom Hops with Bug Catching. Those unlocks are different from simply waiting for a planted crop to mature.
For Watermelon, allow sixteen growth nights and check the current seed description for its planting season. Do not assume that another crop's task reward unlocks Watermelon Seed.
Pumpkins and Corn are separate entries in painting 3. The room does not accept a spare Pumpkin for missing Corn, nor does it accept a cooked Pumpkin dish where the crop itself is requested.
Painting 4 includes ordinary crop names alongside Worm, Eyeball, and other unusual produce. Eyeleaf Seed grows Eyeball, with a listed four-day growth time. Soulfruit has a much longer listed growth time of twenty-four days. Retaining a required item from a harvest can therefore avoid another long wait simply because you sold every copy.
Purple Room forage and mining checklist
The second-floor left room starts with gatherables, then mushrooms and wooded-area materials, then basic and advanced mining products. Its full-room reward is Ring of Plenty +8.
| Painting | Full item checklist | Quantity rule |
|---|---|---|
| 1 — Seasonal Gatherables | Bitter Herb × 1; Red Mushroom × 1; Bloodberries × 1; Sunflower Seeds × 1; Dead Leaves × 1; Snow Pearls × 1 | Any quality where applicable; exact named item |
| 2 — Mushrooms | Bulbous Mushroom × 1; Night-Hood Mushroom × 1; Dual-Sprout Mushroom × 1; Golden Mushroom × 1; Gravemoss × 1; Ancientwood × 1 | Any quality where applicable; exact named item |
| 3 — Mining Bars | Coal × 15; Salt Rock × 10; Copper Bar × 5; Iron Bar × 5; Gold Bar × 3; Void Crystal Bar × 1 | Any quality where applicable; exact named item |
| 4 — Complex Mining Bars | Green Crystal × 5; Verdite Bar × 3; Platinum Bar × 1; Gold Plate × 2; Steel Bar × 2; Blacksteel Bar × 1 | Any quality where applicable; exact named item |
For painting 1, Bitter Herb can be gathered throughout the year, while Dead Leaves are associated with Witch and Snow Pearls with Death. Sunflower Seeds means the seed itself, rather than a different sunflower product. Reserve one copy before using an entire stack in recipes.
Painting 2 takes four specific Old Woods mushrooms. Gravemoss points toward the Catacombs, while Ancientwood comes from ancient trees or relevant loot in the Deep Woods and other later wooded areas. A stack of Common Mushroom is not a substitute for Golden Mushroom or Night-Hood Mushroom.
Painting 3 separates Salt Rock from processed Salt, and bars from raw ores. You need fifteen Coal and ten Salt Rock, then the exact bar counts in the checklist. Copper, Iron, Gold, and Raw Void Crystal use Furnace processing for their requested bars.
Painting 4 includes a different advanced chain. Verdite Ore and Platinum Ore provide their Furnace bars. Dense Gold Ore, Dense Iron Ore, and Blackiron Ore are processed in a Blast Kiln for Gold Plate, Steel Bar, and Blacksteel Bar respectively. The ordinary Gold Bar requirement in painting 3 does not complete Gold Plate in painting 4.
Orange Room encounters, bugs, and trophies
The second-floor center room mixes six adventure collections. Completing three paintings gives Totem of Calling; finishing all six gives Slayer's Ring +8. Five paintings need one of each item, while the bug painting needs five of each insect.
| Painting | Full item checklist | Quantity rule |
|---|---|---|
| 1 — Body Parts | Mysterious Ooze × 1; Brain × 1; Viscera × 1; Creature Claw × 1; Bloody Skin × 1; Entrails × 1 | Any quality where applicable; exact named item |
| 2 — Unique Enemy Drops | Soulroot × 1; Goldpuff × 1; Rune of the Dead God × 1; Corrupted Tar × 1; Hard Bones × 1; Apple × 1 | Any quality where applicable; exact named item |
| 3 — Unique Event Drops | Godscale × 1; Spectral Rain × 1; Sign of Death × 1; Beating Heart × 1; Void Sphere × 1; Staring Orb × 1 | Any quality where applicable; exact named item |
| 4 — Cursed Drops | Duskmelon × 1; Duskberries × 1; Eldersprout × 1; Cursed Milk × 1; Goat Horn × 1; Wishbone × 1 | Any quality where applicable; exact named item |
| 5 — Bugs | Nightcrawler × 5; Dustfly × 5; Shadewing Moth × 5; Bloodwing Moth × 5; Pale Empress Moth × 5; Firefly × 5 | Any quality where applicable; exact named item |
| 6 — Skull | Skull of the Mall × 1; Skull of the Woods × 1; Skull of the Catacombs × 1; Skull of the Deep × 1; Skull of the Lost × 1; Skull of the Dark × 1 | Any quality where applicable; exact named item |
Body materials and unusual event items
Painting 1 contains encounter materials. Search the appropriate encounter rewards for Mysterious Ooze, Brain, Viscera, Creature Claw, Bloody Skin, and Entrails. A fight does not guarantee every item in that group; they are separate rewards rather than a universal six-piece drop.
Painting 2 includes Soulroot and Goldpuff, which also have Old Woods or Deep Woods gathering routes. Rune of the Dead God, Corrupted Tar, and Hard Bones are associated with Catacombs encounters and corpse or container events. Apple comes from Teacher's Pet loot in the School.
Painting 3 is particularly easy to stall by treating every entry as ordinary combat loot. Spectral Rain is associated with Rainman. The Fallen Angel can exchange a Living Soul for Sign of Death. Godscale has fishing treasure, Treasure Casket, or Weird Fish routes.
Beating Heart has the Pointing Fingers mystery and a fixed Chamber of Nezroth pickup among its routes. Void Sphere has Staircase event rewards and a fixed Daeus Room 2 pickup, as well as Void content. Staring Orb is associated with the Staring Lady or Woman mystery. Pursuing the specific item route is more useful than repeating an unrelated nearby fight.
Cursed products, insects, and named skulls
Duskmelon, Duskberries, and Eldersprout use the Cursed Seed Shop and a Void Ritual before their crop production. Cursed Milk comes from the Tentacow imposter, not every normal milking. Goat Horn can result from a Goat odd event or relevant Lost Journal closets. Wishbone has encounter and certain School garbage-mimic routes.
For painting 5, the first five insects use the Bug Catching Net in the Old Woods. Fireflies have a Catacombs net route or Tier 2 Bait Box drops. Save five of each species; bringing five insects in total does not complete a six-species painting.
The final painting uses six named boss trophies. Skull of the Mall follows the Mall Administrator; Skull of the Woods follows the Ancient Tree; Skull of the Catacombs follows the Soul of the Catacombs; Skull of the Deep follows the Deep Mall boss. Skull of the Lost comes from the Emissary of Delvek at the Hidden Manor, and Skull of the Dark from the Emissary of Kaal in the Deep Catacombs.
These are distinct from an ordinary Skull material. A generic Skull cannot replace a trophy whose name identifies a specific encounter.
Red Room exact Void-quality checklist
The second-floor right room checks the purple Void icon on every requested item. All 24 entries need one copy each. Finish its four paintings for the Kitchen rack reward.
| Painting | Full item checklist | Quantity rule |
|---|---|---|
| 1 — Fish | Mud Perch × 1; Fog Eel × 1; Stalktopus × 1; Razorfish × 1; Ancient Pike × 1; Corpsefish × 1 | Every item must be Void quality |
| 2 — Farming | Celery × 1; Pumpkin × 1; Grapes × 1; Tomato × 1; Corn × 1; Ghostberries × 1 | Every item must be Void quality |
| 3 — Husbandry | Large Egg × 1; Large Milk × 1; Large Goat Milk × 1; Cloudberry × 1; Cheese × 1; Mayonnaise × 1 | Every item must be Void quality |
| 4 — Aged | Aged Cheese (Artisan) × 1; Aged Cheese (Perfect) × 1; Aged Goat Cheese (Artisan) × 1; Aged Goat Cheese (Perfect) × 1; Aged Gloom Ale × 1; Aged Honey Mead × 1 | Every item must be Void quality |
Reserve quality before processing
The fish painting uses Lakefront, Mall, and Campsite catches. You may already have caught the species for another purpose, but only a Void-quality copy meets this painting's check. Catching another ordinary Stalktopus does not advance the exact-quality row.
The crop painting asks for Void-quality Celery, Pumpkin, Grapes, Tomato, Corn, and Ghostberries. Keep those particular harvests for the painting instead of cooking them just because a food recipe accepts any quality.
The husbandry painting needs Void-quality Large Egg, Large Milk, Large Goat Milk, and Cloudberry, plus Void-quality Cheese and Mayonnaise. The listed processing routes use Void-quality Large Milk in a Food Processor for Cheese, and Void-quality Large Egg for Mayonnaise. Check the finished output's icon before donating it.
Aging stage and quality are separate
A Cask advances through named stages at seven-day intervals: Basic after seven days, Quality after fourteen, Artisan after twenty-one, and Perfect after twenty-eight. The word “Quality” in an aged product's name is an aging stage and does not mean its quality icon automatically changed.
Painting 4 needs both Artisan and Perfect versions of aged Cheese, and both Artisan and Perfect versions of aged Goat Cheese. Collect the Artisan copy after twenty-one days and a separate Perfect copy after twenty-eight. One product cannot be both submitted versions at the same time.
Aged Gloom Ale and Aged Honey Mead use the fourth, final aging stage at twenty-eight days. Inspect their actual quality icons as well as their product names. Waiting for the final stage is not a replacement for the Red Room's Void requirement.
Yellow Room painting 2 awards three Casks, connecting that artisan collection with the later aging work. You can use those machines for the Red Room requirements, but still need the correct inputs and separate finished products.
Choose the next painting by its missing step
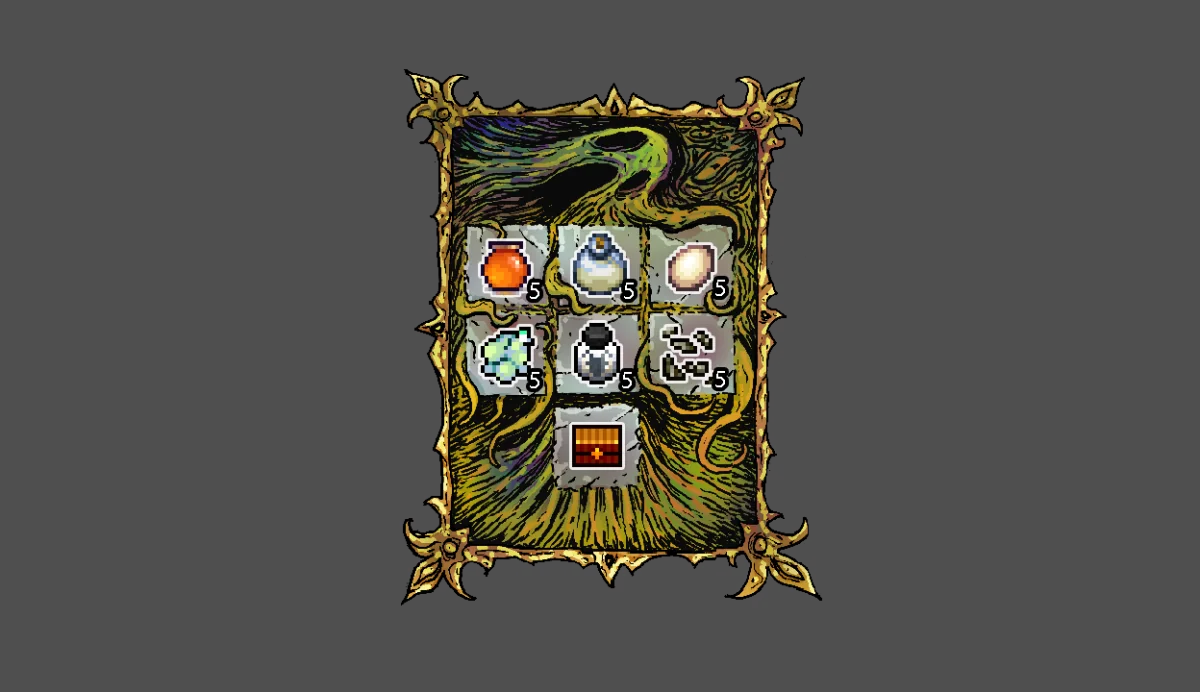
For an unfinished painting, identify whether its remaining obstacle is an item name, quantity, station, recipe unlock, encounter, season, processing time, or quality icon. Those problems call for different actions.
Crab-pot products need catches, wet bundles need drying, bars need the right furnace or kiln chain, boss skulls need their named encounters, and aged products need both a stage and an icon check. Keep completed donations separate from the spare ingredients you are using for meals.
Use the room milestones to set practical goals: three Yellow or Orange paintings can give their partial rewards while another collection is still waiting on advanced materials. For full completion, return to the individual six-item checklist rather than assuming a room's theme covers all of its requirements.
Editorial verification
This guide was source-checked on . Confirmed game details, community observations, older-build behavior, and unresolved evidence gaps are identified in the article instead of being presented as equally certain.
Found an outdated step or a version mismatch? Send a correction to Kevin.