
Start by speaking to Hans and Molly, equipping your weapon, and learning the difference between saving, sleeping, and bathing. Farming supplies your journey, but tasks and exploration unlock the equipment and facilities that make farming easier. Visit the Mall when your tasks point there, carry food, and keep your Rusty tools for upgrades.
Welcome to Elderfield beginner priorities
You can spend a long time tending crops without reaching the systems that improve your equipment. A better opening plan is to alternate farm work with short trips through town, returning home before your supplies run low. Treat the following order as a practical route, not a requirement to finish every task before exploring elsewhere.
- Equip the weapon you receive during the opening sequence. Finding equipment does not mean it is already in the correct slot.
- Talk to Hans at the farm and follow his introductory wheat task. This leads into the farming and processing systems.
- Find Molly's workshop on the route toward the farm. Her introductory mining task provides access to the tools and facilities needed for further crafting.
- Learn where your bed, bath, storage, and cooking facilities are. Each solves a different problem.
- Follow the town's tasks toward the Mall, then explore its shops and food court as your equipment allows.
The useful measure of progress is the number of new options you have opened, rather than the amount of ground you have cleared. A workshop, a new shop, or a way home can save repeated journeys. If you need the farming sequence in detail, use the Hans task guide alongside this overview.
Saving, sleeping, and bathing do different jobs
The bed lets you save without committing to sleep. Use that separation before leaving with valuable supplies or testing an unfamiliar interaction. Saving records your position in the run; sleeping exposes you to the game's sleep-related events and advances your rest cycle.
Sleeping is not your standard full heal. Going to bed while injured can leave you vulnerable to a bad sleep outcome, so inspect your HP before choosing that option. Staying awake for extended periods also has consequences, including accumulating penalties, so avoiding sleep indefinitely is not a free substitute for managing those events.
The bath restores HP and MP and clears ordinary blessings and curses, but it also resets defeated enemies and mysteries. That makes bathing a decision about the world as well as your health. If you have cleared a route and want to finish a nearby objective, consider completing that trip before resetting its encounters.
| Action | Main use | Consequence to remember |
|---|---|---|
| Save at the bed | Record progress without necessarily sleeping | Saving and sleeping are separate choices |
| Sleep | Rest and proceed through sleep events | Sleep is not a guaranteed heal or harmless time skip |
| Bathe | Restore HP and MP and clear ordinary statuses | Defeated enemies and mysteries return |
| Eat or use a healing skill | Recover during a journey | Uses food, MP, or other resources |
Some lasting changes and special statuses behave differently from ordinary battle curses. A permanent reduction is not necessarily restored by bathing, and a moon-related effect should not automatically be treated like a removable combat status. Read the actual status description before spending repeated trips trying to remove it.
Molly's workshop and the first tool upgrades
Molly is easy to miss if you rush between home and the farm. Look for the workshop on that route. If its door is closed, speak to Tanner first; the old Lost Gameboy prerequisite was removed. Then follow Molly's introductory mining conversation instead of searching shops for every starting tool. The opening copper task introduces the Beginner Mines and supplies a Rusty Pickaxe for the job.
Bring the requested copper back and finish the conversation rather than merely collecting the ore. This unlocks Molly's workshop facilities, including the Forge, and provides the Furnace needed for processing. If you have read an older task order, the Furnace was moved away from Hans's second task in a later update; waiting for Hans to provide it can send you down the wrong route.
Keep your Rusty tools. They are part of the upgrade path, and the Forge has an Upgrade tab that is separate from simply browsing its crafting list. Before collecting a large pile of materials, check which tab contains the upgrade and which original tool the recipe expects.
For the axe specifically, follow the axe upgrade route. That guide separates the workshop prerequisite, the Forge interface, and the distinction between Rusty and Basic tools. A blocked tree can indicate an equipment requirement, while a missing recipe can indicate that you are looking in the wrong place.
Crafting materials and machine inputs are separate
Crafting can draw materials from storage, but processing does not use the same rule for its raw ingredients. For a processing machine, place the input material into the machine yourself; fuel is the part that can be taken automatically from storage. Having ore in a chest is therefore not proof that a Furnace has started working.
When a recipe or machine refuses to run, first identify the operation you are attempting. Then check the input, the fuel, and the container holding each item. Moving one required ingredient into your carried inventory is a useful troubleshooting step when the interface cannot see something you know you own.
Ordinary storage and the fridge should not be assumed to share every recipe lookup. Food can also be a crafting ingredient, so an item stored for cooking may be needed elsewhere. Check the station's displayed requirements before buying a second copy or concluding that the recipe is broken.
Pay attention to the completion estimate when starting a job. Older interfaces did not keep a running countdown visible, making it easy to forget when a batch was due. Processing during sleep was restored in Demo v0.11.17, so the blanket advice to remain awake for every machine is outdated.
The Secret Sauce guide shows this distinction in a specific production chain. Eyeleaf provides Eyeballs, and the Grinder turns the appropriate input into the ingredient you need. Knowing which stage you are missing is more useful than repeatedly opening the cooking menu.
Farming without wasting the first harvest
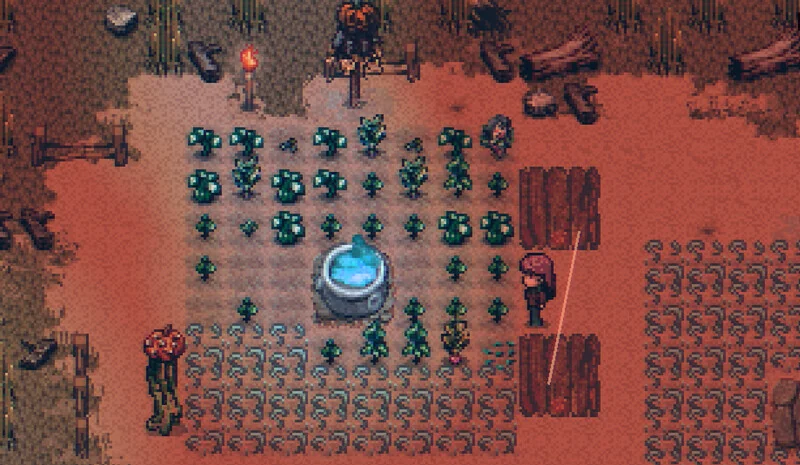
Start with the crop Hans requests, and protect the planted area before committing your most valuable seeds. Scarecrows reduce the risk of crows eating crops, so inspect their coverage rather than assuming one protects the entire field. Clearing every log and rock immediately is less useful than preparing a manageable area you can maintain.
Check watering after planting, especially when you have just harvested and replanted during rain. Older playthroughs show newly planted crops failing to inherit the day's rain watering. Looking at the tile costs less than discovering later that a valuable crop missed a growth opportunity.
Not every prepared plot accepts ordinary crop seeds. The separate garden spaces are used for flowers and other specialty planting, so a rejected seed does not necessarily mean the plot is unusable. Match the seed type to the planting area before trying to fix a problem that is actually a different system.
Season rules are also more flexible than a simple assumption that every crop dies at a season boundary. Check the seed or crop information for its own restrictions. A rule that works for wheat or one flower should not be extended to every unusual plant on the farm.
Reserve produce needed for active tasks before selling the rest. The traveling merchant can offer better prices for selected crops, which creates an optional reason to keep some stock. Balance that opportunity against a tool or ingredient you need now rather than holding all your income for an uncertain future offer.
The Mall is an early progression destination
Several town tasks send you toward the Mall. If those directions keep appearing, take them as a reason to investigate rather than assuming the whole location belongs to the end of the game. You can leave a difficult room, improve your equipment, and return without abandoning every useful shop or conversation in the building.
Explore the video-game shop on the first floor and speak to the people inside. This is where the Warp skill becomes available, providing a way to return home that is easy to miss if you only follow the main task marker. Check its displayed requirements when using it rather than relying on a universal cost estimate from an older playthrough.
The food court also leads to larger mines. Those mines matter when a task asks for materials that the Beginner Mines do not reliably provide. Before heading down, check your pickaxe, available inventory space, health, and food; reaching a new ore deposit is not enough if you cannot mine it or survive the route out.
Use the mine reset guide when a cleared mine appears empty. The documented resource cycle involves a weekly refresh and bathing, rather than a promise of fresh ore every morning. A reset also does not guarantee the particular ore your recipe needs.
Combat preparation begins before the encounter
Check your equipment slots after finding a new weapon or piece of clothing. Compare the effects that matter to your current plan, including MP costs, rather than choosing an item solely because one attack number is higher. Equipment can change the cost of healing as well as offensive actions.
During battle, action points determine how many actions you can take that turn. Attacks, skills, rituals, and items give you different ways to spend that opportunity. Watch the enemy's action display as well as your own, because a plan that assumes you will act again before the enemy may fail if its next turn contains several actions.
Combat points are a separate system. Swift, lethal, and defensive points support effects such as dodging, critical hits, and recovery. Skills and equipment can generate those points, so reading their descriptions helps you understand why a modest-looking action might be useful in a longer fight.
Food is part of your preparation, not just a way to use spare crops. Carry recovery items before entering an unfamiliar dungeon, and read whether an item restores HP, MP, or something else. Two foods with similar names or different quality levels should not be treated as interchangeable simply because an old tip gives them the same recovery number.
Farming and gathering can also lead to combat. A quiet resource trip is therefore a poor reason to leave yourself at low health or without a usable weapon. If routine encounters are consuming most of your supplies, shorten the trip and improve the setup before attempting a deeper route.
Difficulty settings and manageable exploration
The available difficulty choices include Cozy, Easy, Normal, Hard, Nightmare, and Custom. Cozy still includes combat; choosing it does not turn the game into a completely peaceful farming simulator. Pick it when you want the farming and exploration side to carry more weight in your experience.
Read Custom settings carefully before starting, because Custom choices cannot be changed afterward. Do not treat them as a temporary set of switches that you can freely revise after seeing an encounter. For other difficulty controls, follow the options actually offered by the bed rather than assuming every setting is reversible in both directions.
There is no need to prove that you can clear every newly accessible room on the first visit. An unfamiliar enemy can be a signal to improve your equipment or change your approach. Record the location and return with a specific improvement, such as a better weapon or more reliable recovery, instead of repeatedly paying for the same unsuccessful attempt.
Conversations, gifts, and the journal
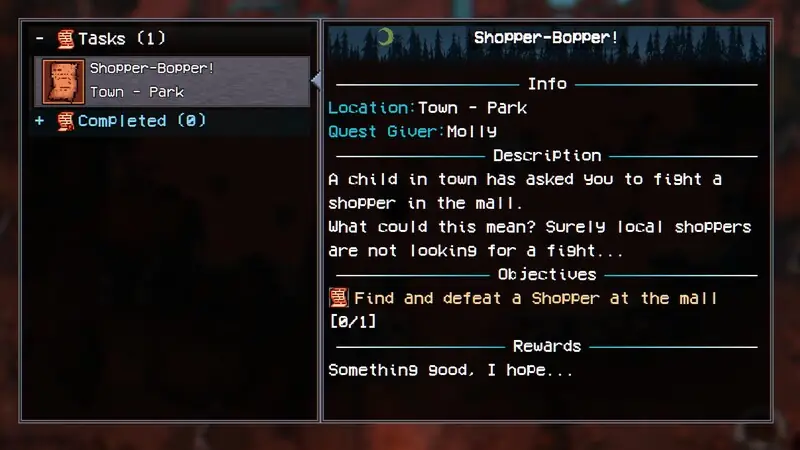
Speak to townspeople even when there is no obvious task marker above them. Conversations introduce work, point toward locations, and sometimes provide useful items. After accepting a task, read the journal and any attached notes before leaving for its destination.
If a detail is missing from the journal, return to the character and revisit the task conversation. Not every spoken direction is preserved as a separate journal update. This is especially useful when you remember the item requested but have forgotten the workshop, room, or person involved.
Use the Social menu to record what you learn from gifting. Gift preferences changed during development, so an old favorite-gift list can waste a limited opportunity. Start with the characters guide and use the romance guide when you are ready to distinguish friendship progress from marriage requirements.
Taxes, news, and optional distractions
The tax sign at the farm entrance records the current demand and when it is due. Check it before selling a crop batch, then put aside what the demand requires. This avoids turning an otherwise useful sale into a scramble to replace a required item.
Television news can point to temporary events, unusual visitors, blood trails, treasures, and telephone numbers. These are interesting opportunities, but an early character may not be ready for the encounters attached to them. Choose an event when you have the supplies to investigate, rather than assuming every broadcast must be finished immediately.
For a telephone broadcast, use the Fancy Closet calling guide to separate finding the phone from knowing the number. For the tower on the farm, begin with the Stone Tower progression guide and its library connection. Those are distinct chains, so making progress on one does not mean the other is ready to complete.
A useful routine before the next trip
Before leaving home, choose one main objective and inspect the items that objective requires. Save, check your health and equipment, and carry the recovery supplies you intend to use. If you plan to process materials while exploring, start the machine with its actual input before walking away.
On the return trip, finish the relevant NPC conversation and check the journal for the next step. Store ingredients according to the station that needs them, reserve crops for tasks and taxes, and decide whether bathing will reset a route you still want to use. This keeps farming, crafting, and exploration connected without turning every day into the same checklist.
Back to top