
Molly's first important quest is Helping Molly in the Town Outskirts. She gives you a Rusty Pickaxe; use it to mine one Copper Ore in the local mine and bring the raw ore back. Completing the hand-in opens her Workshop, gives one Furnace, and unlocks the Furnace blueprint.
Her later The Elder Gem task sends you toward the mine in the Mall food court and rewards the Lapidary Table blueprint, which unlocks equipment upgrading at the anvil after the table is crafted and placed. Molly also belongs to the Molly–Tanner–Celeste school-adventure group, but the captured trigger threshold conflicts across versions and should not be treated as a guaranteed four-heart event.
Welcome to Elderfield Molly quest order
| Stage | What to do | Main result |
|---|---|---|
| Find Molly | Follow the Outskirts path toward the farm and check the Workshop | Meet the blacksmith and task giver |
| Helping Molly | Mine one Copper Ore with her Rusty Pickaxe and return it | Workshop access, one Furnace, Furnace blueprint |
| Workshop progression | Use the Furnace and Forge as separate stations | Process ore and create available equipment |
| The Elder Gem | Search the mine in the Mall food court for the named objective | Blueprint: Lapidary Table Upgrade for the Forge |
| School Adventure | Build friendship with Molly, Tanner, or Celeste and wait for the correct invitation state | Separate story event; not required for Workshop access or marriage |
Do Helping Molly before treating a locked Workshop or absent Forge as a crafting bug. The later equipment-upgrade route depends on a functioning Workshop, but the school adventure does not. The Forge upgrade guide covers stations and material flow after Molly's task is complete.
Find Molly and open the Workshop

Molly's Workshop is on the path leading toward the farm in the Town Outskirts. It is both her home and her main service location, but she follows a schedule and is not always standing there. Captured schedule data lists the Workshop, Library, Town Task Board, and outside the General Store as daytime possibilities. Evening can place her at the Saloon or leave her at the daytime location, while night lists the Workshop. Sunday daytime is also listed at the Workshop.
Rain or snow is recorded as a home condition, which makes the Workshop a useful first check in bad weather. Treat all schedule entries as routes, not exact appointments. Random location selection and story state can still move a character.
If Molly is absent:
- Check the Workshop interior and entrance.
- Look near the Library, Task Board, and General Store.
- Check the Saloon in the evening.
- Return to the Workshop at night or on Sunday.
- Read the active journal in case the objective requires the mine rather than another conversation.
The map and location guide identifies the Farm, Town, and Workshop route. Repeatedly searching the Mall will not find the opening Molly task; the Mall becomes relevant later for The Elder Gem.
Complete Helping Molly
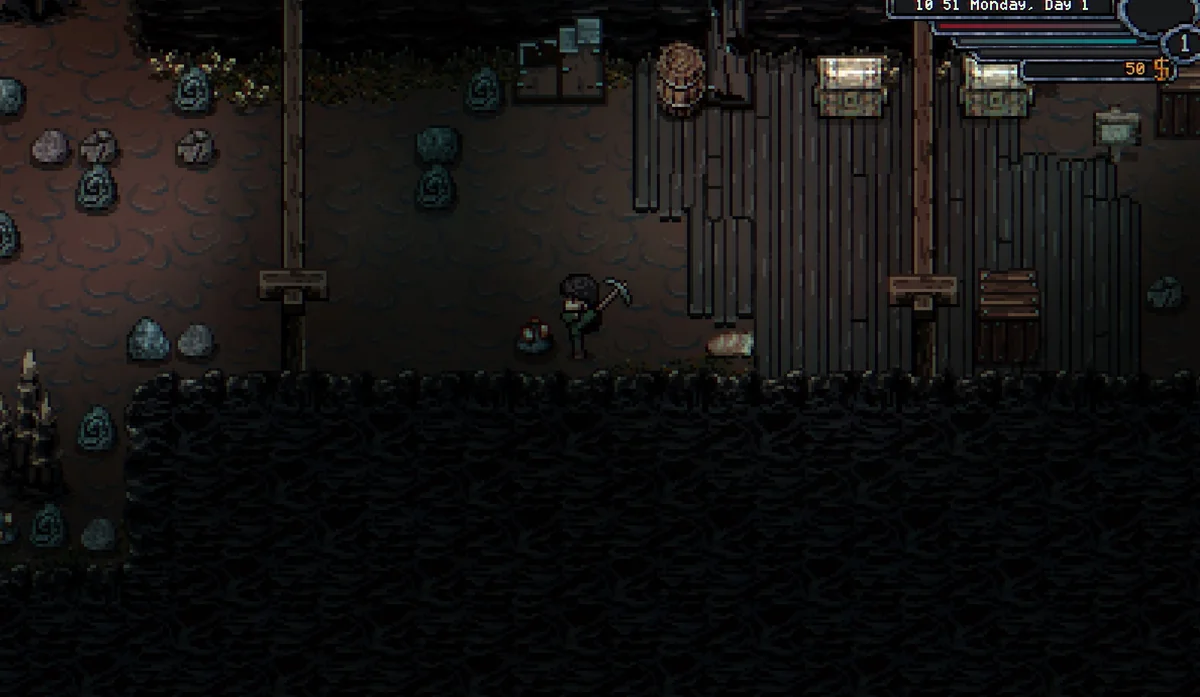
Helping Molly is a compact tutorial for the mining and forging loop. Accept it from Molly in the Town Outskirts. The task grants a Rusty Pickaxe when it begins and asks for one Copper Ore from the local Mines.
Follow the item names exactly:
- Confirm the Rusty Pickaxe entered inventory when the task started.
- Equip or use it as required by the mining interface.
- Enter the nearby accessible mine rather than a later locked Mall mine.
- Break a copper-bearing node and verify Copper Ore appears.
- Keep at least one raw Copper Ore unprocessed.
- Return to Molly and complete the dialogue.
- Check for Workshop access, one Furnace, and the Furnace blueprint.
Copper Ore and Copper Bar are different. Do not smelt the only ore before the hand-in. The Furnace is part of the reward, so a player who has not finished Helping Molly should not need to process the requested ore through that station first.
If the pickaxe seems missing, check tools and the task-start state before buying or forging a replacement. The task table specifically records the Rusty Pickaxe as an “Upon Starting” reward. If the journal was accepted but the tool never appeared, preserve that state for a bug report instead of assuming an undocumented shop purchase is required.
Confirm every Helping Molly reward
The completion record includes three practical outcomes: access to the Workshop, one Furnace, and the Furnace crafting blueprint. Verify all three because they solve different needs.
- Workshop access lets you reach Molly's equipment services.
- The gifted Furnace can be placed and used immediately when location rules allow.
- The Furnace blueprint lets you craft another at the Workbench when the materials are available.
Owning a Furnace does not mean the blueprint is learned, and learning the blueprint does not place a Furnace automatically. Open the inventory, crafting list, and Workshop separately.
The Furnace smelts supported raw materials; the Forge makes listed equipment. When the Forge says it needs Copper Bars, use the Furnace to process later Copper Ore. That is the normal material loop, not a second Helping Molly objective.
The axe upgrade route uses Molly's service but also depends on axe-specific task rewards. Opening the Workshop alone does not place every tool tier in inventory.
Complete The Elder Gem
Molly's later task asks for the Elder Gem and points toward the mines in the Mall food court, “where danger awaits.” Completion rewards the Blueprint: Lapidary Table Upgrade for the Forge.
Prepare the route before entering the Mall:
- Carry a proven weapon and recovery food.
- Leave room for the named quest item.
- Confirm The Elder Gem is active in the journal.
- Separate the food-court mine from the local beginner mine used in Helping Molly.
- Preserve a save before a new combat area.
The captured task record does not give a reliable exact floor, drop percentage, or substitute item for the Elder Gem. Search the objective area and follow the current journal text rather than accepting a guessed coordinate. If a video shows a fixed drop in an older build, use the visible item name and current task state to verify it.
After obtaining the Elder Gem, return to Molly and finish the hand-in. Then check that the Lapidary Table blueprint is learned. Craft the table at a Workbench and place it on the Workshop's dedicated Forge-upgrade platform. The recorded table description says this unlocks Equipment Upgrading at the anvil and that upgrades consume gems to raise item level.
That system is not the same as forging a new named item. If a player wants a stronger version of an existing weapon, use the anvil after the table unlock. If the desired item is a different weapon or tool tier, use the Forge recipe path.
Use Molly's Workshop without mixing stations
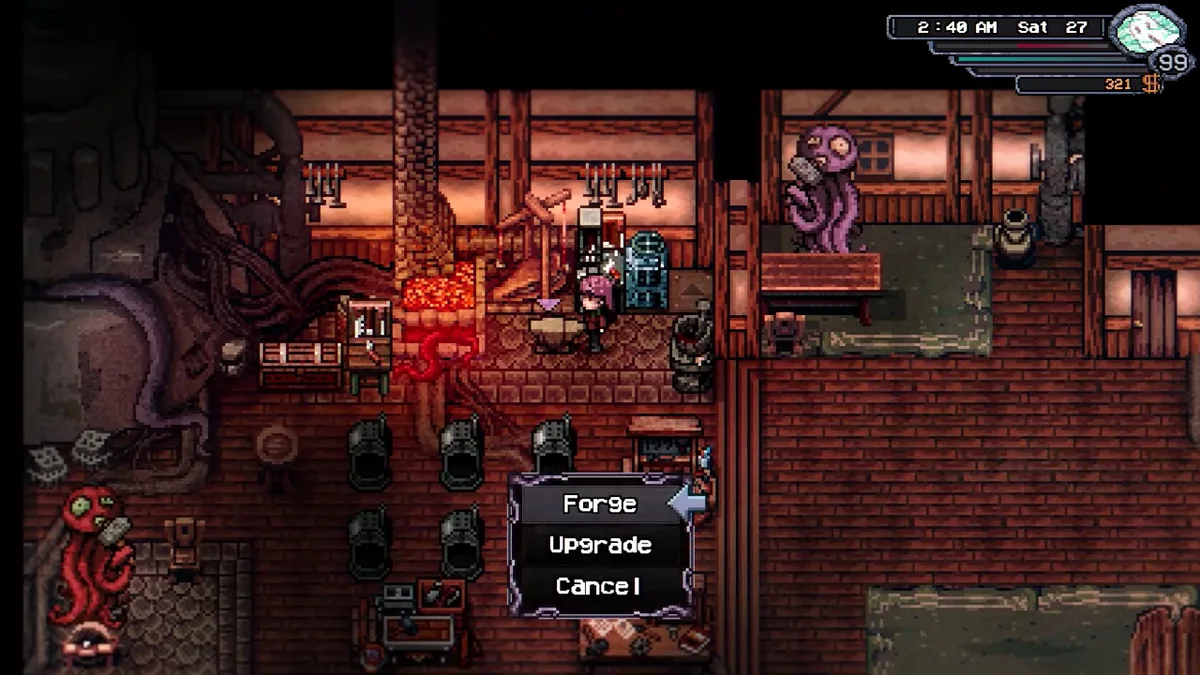
| Station | Primary role | Common mistake |
|---|---|---|
| Furnace | Smelt supported raw materials | Expecting it to create finished weapons |
| Forge | Create visible equipment and tool recipes | Assuming every later recipe appears after Helping Molly |
| Workbench | Craft learned station blueprints | Owning a blueprint but never crafting the table |
| Lapidary Table | Unlock equipment upgrading when placed on the dedicated platform | Leaving it in inventory or in an unsupported place |
| Anvil | Upgrade equipment levels after the table route | Looking here for a completely different named weapon recipe |
Open the correct interface before diagnosing missing materials. A material can be present and still appear unusable because the selected station performs another function. The Workshop contains several related systems in one place, which makes this error more likely than it would be on the farm.
Captured notes say some Molly tables have overlapping item entries in the Steam release. When two menus list the same item, compare the displayed result and cost rather than assuming one is a separate hidden upgrade. Preserve a screenshot if the overlap produces different outcomes.
Molly's School Adventure trigger
Molly is grouped with Tanner and Celeste for a school adventure. Captured search material says a letter can be triggered by reaching four hearts or 80 friendship points with any one of those three. Other version records describe a higher threshold, and the source page itself was blocked during collection. That means four hearts is a useful checkpoint, not a guaranteed current trigger.
Use this cautious process:
- Build friendship with Molly, Tanner, or Celeste.
- At four visible hearts, check mail and finish any pending conversation.
- If no invitation arrives, continue friendship instead of resetting the save.
- Complete another active school adventure before expecting a new group invitation.
- Keep the Workshop quest chain separate; it does not require the school event.
The romance and marriage guide records the same threshold conflict. Molly can be a spouse, but marriage uses its own ten-heart and Ring of Binding route. The school adventure is not a prerequisite for proposing.
Avoid repeating one online number as certainty. The useful fact is the group and the letter-based trigger pattern; the exact current friendship threshold must be confirmed in the installed build.
Build friendship without sacrificing upgrade materials
Captured gift tables list many materials and foods for Molly, including several ores, bars, gems, and crafted products. Those lists are broad and have changed across versions. Do not give away the only bar, gem, Elder Gem-related object, or predecessor item needed for a Workshop upgrade.
Use the Social menu to record her response. Test a renewable or low-cost item before a rare component. The gift guide explains why current in-game reactions should outrank an old “loved gifts” table and how to preserve the weekly allowance for a proposal or task exchange.
Service progression and friendship progression are separate. Helping Molly opens practical systems even if friendship remains low. Conversely, a high heart level does not automatically smelt ore, install the Lapidary Table, or complete The Elder Gem.
Fix a Molly quest that will not progress
| Symptom | Check first | Next action |
|---|---|---|
| Molly is absent | Workshop, Library, Task Board, General Store, Saloon, time and weather | Follow the location loop and return at night |
| Helping Molly not active | Tanner/Workshop access and Molly's dialogue | Finish the opening conversation and confirm the journal |
| No Rusty Pickaxe | Task-start reward and tools inventory | Reload once from before acceptance and document if still absent |
| Copper does not count | Copper Ore versus Copper Bar | Keep one raw ore and return to Molly |
| Workshop remains closed | Reward conversation incomplete | Revisit Molly until the journal marks completion |
| Furnace recipe absent | Blueprint not learned or menu not refreshed | Inspect the reward, reopen crafting, reload the save |
| The Elder Gem task is stuck | Correct Mall food-court mine and active journal stage | Follow the current objective; do not substitute a normal gem |
| Anvil lacks Equipment Upgrading | Lapidary blueprint, craft, placement | Build and place the table on the Workshop platform |
| School letter does not arrive | Threshold conflict, mail, another active adventure | Continue friendship and clear the competing event |
Only change one state at a time. If Molly is missing, do not also move stations and consume quest materials while testing. If an unlock is missing, record the journal and menu before reinstalling or starting a new save.
Preserve version evidence for Molly's quests
Molly's systems were revised during development, including schedules and Workshop behavior. A current report should include the game build, day and time, weather, active quest title, exact objective, Molly's last known location, and the relevant station menu. That evidence distinguishes a schedule misunderstanding from a failed reward flag.
The dependable route remains: find Molly's Workshop, accept Helping Molly, mine and return one raw Copper Ore, claim Workshop and Furnace access, then follow The Elder Gem toward the Mall mine and Lapidary Table. Treat the school invitation threshold and overlapping table entries as version-sensitive details rather than guaranteed rules.
Keep Molly's quest materials organized
Use separate storage groups for raw ore, smelted bars, predecessor equipment, gems, and active task items. This is not a hidden Molly requirement; it is a way to prevent the Workshop's connected systems from consuming the wrong form. Label one Copper Ore as reserved until Helping Molly closes. After The Elder Gem begins, keep every quest-named gem separate from ordinary crafting gems until Molly accepts the correct object.
Before any major craft, compare the item name in three places: journal, inventory, and station recipe. “Copper,” “gem,” or “upgrade” is too broad when the game distinguishes ore, bars, specific gems, blueprints, placed stations, and equipment levels. That thirty-second check protects both the quest and the rare material supply. It also produces a clear diagnosis: if all three names match and the interaction still fails, the problem is a state or version issue rather than a missing ingredient.
Editorial verification
This guide was source-checked on . Confirmed game details, community observations, older-build behavior, and unresolved evidence gaps are identified in the article instead of being presented as equally certain.
Found an outdated step or a version mismatch? Send a correction to Kevin.