
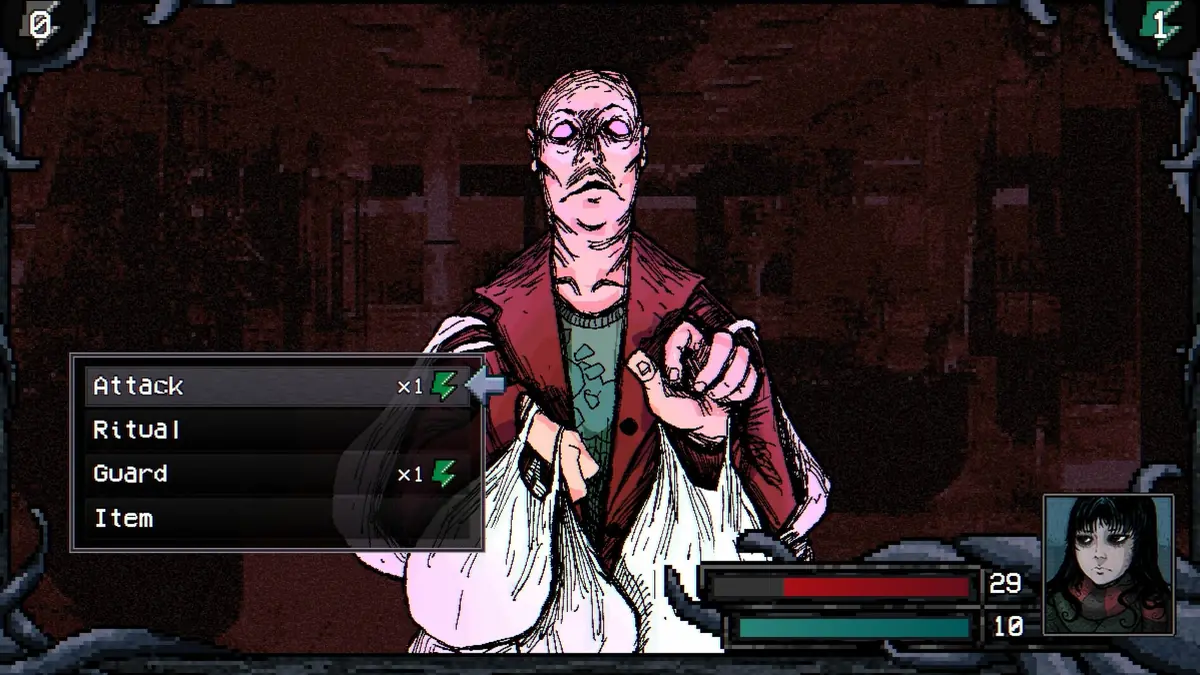
Welcome to Elderfield combat is turn-based. Enter a fight with a weapon equipped, enough HP and MP for the encounter, and food you are willing to spend from the battle menu. Attacks, skills, rituals, and item use compete for turns, so preparation matters more than trying to repair a weak loadout after an enemy has already started dealing damage.
There is no reliable evidence for universal level scaling across every enemy. A developer community reply instead describes progression tied to major bosses—especially bosses connected to Adrian's tasks—with some later enemies and events appearing after those milestones. Treat a sudden difficulty jump as a reason to check equipment, access progression, and the enemy's properties, not as proof that ordinary leveling made the whole world stronger.
Welcome to Elderfield combat essentials
| System | What the evidence supports | Practical use |
|---|---|---|
| Battle flow | Combat uses a turn-based command structure | Choose each action for the current threat instead of button-mashing |
| Recovery | Food can be used in combat; bathing at home fully restores HP and MP | Carry food for the trip, then use the bath between dangerous routes |
| Abilities | Skills and rituals are available combat tools | Check MP and the effect you need before committing a turn |
| Equipment | Weapons come from shops or Forging; fights award experience and items | Improve the loadout as well as the character level |
| Progression | Major bosses can trigger specific enemies, broadcasts, and events | Expect some encounters to change after story milestones |
| Scaling | No universal enemy-scaling rule is confirmed | Diagnose the actual enemy and your gear before grinding blindly |
The most important distinction is between combat power and world progression. A better weapon can make an existing fight manageable. Completing a boss can also advance the world and introduce a different fight. Those are separate changes. If an area feels harder after a quest, compare the enemy name and location before assuming the old enemy received a hidden stat increase.
The beginner tips route covers the non-combat unlocks that put weapons, food, and recovery within reach. This page starts at the point where an encounter is likely and focuses on how to prepare, spend turns, and investigate a loss.
Prepare before every Welcome to Elderfield fight
Do the preparation at home or beside a safe exit, not in the first turn of a boss fight. A short pre-fight check prevents most avoidable failures:
- Restore HP and MP. Bathing at the player's home restores both resources fully, but it also regenerates monsters and mysteries. Use it deliberately: it is an excellent reset before a dangerous route, not a free heal that leaves the rest of the world unchanged.
- Equip the intended weapon. Owning or crafting a weapon does not guarantee that it is equipped. Confirm the active weapon before touching an enemy or a suspicious object that may begin combat.
- Carry two kinds of recovery. One item should cover ordinary chip damage; another should be valuable enough to rescue a fight you still intend to finish. Do not consume the only copy of a task ingredient merely because it appears in the item menu.
- Check MP against the planned abilities. A skill or ritual that you cannot afford is not part of the current plan. Either restore MP, carry a suitable item such as a Mana Muffin, or choose a cheaper approach.
- Leave inventory room. Fights can award items. Free space also makes it easier to distinguish a new drop from materials already in the bag.
- Know the return route. Dungeon access, locked doors, and multi-floor interiors can turn a short fight into a long recovery trip. The world map and location guide helps identify the nearest safe service or exit.
Food use has an opportunity cost because it consumes a combat action. Waiting until HP is almost gone can make healing too slow, especially if the next enemy action is uncertain. A safer rule is to heal while the expected next hit still leaves a margin for an unlucky turn. That is tactical advice, not a hidden numeric threshold: the correct margin depends on the enemy, your defense, and the food you actually carry.
Bathing deserves its own warning. It clears most blessings and curses as well as restoring HP and MP. If a blessing is central to the next attempt, inspect the post-bath status before returning. Conversely, when a curse is the reason a previously manageable encounter has become unreliable, the bath can be part of the reset rather than merely a health refill.
Read the turn-based battle menu deliberately
The battle interface is a decision screen. Before selecting a command, identify what the turn must accomplish: reduce the enemy's ability to finish you, preserve enough HP for the next exchange, or spend MP to shorten the dangerous portion of the fight.
Basic attacks establish the safe baseline
A normal attack is useful not only because it deals damage, but because it reveals whether the equipped weapon is producing a sustainable fight. Watch the result of the opening exchange. If several ordinary hits barely move the enemy while the enemy removes a large share of HP, the problem is probably not a missing secret input. It is a poor matchup, underdeveloped equipment, an unaddressed weakness, or an encounter reached before you are ready.
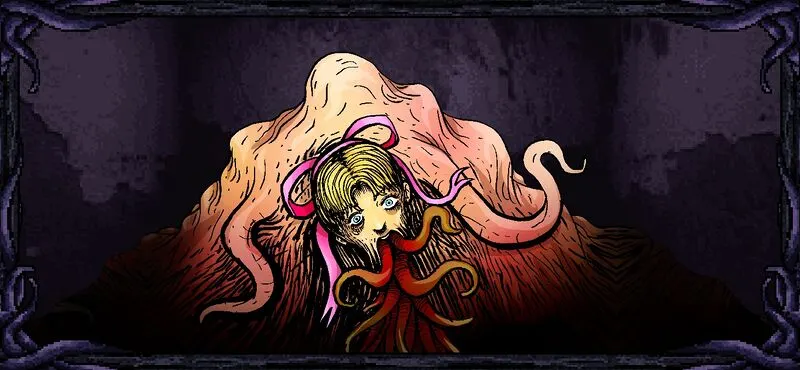
Do not judge a weapon only from its name or crafting tier. Damage type and enemy properties can matter, and the same item can perform differently against a different target. The recorded Flesh Girl data, for example, identifies Insight as its weakness. The dedicated Flesh Girl boss guide explains that matchup without pretending the same answer applies to every monster.
Skills and rituals spend a limited resource
Skills and rituals provide alternatives to repeated basic attacks, but MP turns them into a route-planning decision. Spending everything on the first weak encounter can leave the real objective untouched. Hoarding every point can also extend a dangerous battle and force more healing. Use high-impact abilities where they reduce the number of exposed turns, and keep enough MP for the next required encounter if the route cannot be reset cheaply.
The Old God system can change bonuses, penalties, and God Forge recipes. Those effects should be treated as loadout choices rather than universal upgrades. The Old Gods allegiance guide compares the documented tradeoffs; it is especially useful when a build gains one defensive stat but loses another. A bonus that is strong for one damage plan can be a liability in another fight.
Item use is a turn, not a pause button
Open the item option with a purpose. Read the item's HP, MP, blessing, curse, or ingredient role before selecting it. Some food restores both resources, some restores only one, and some applies an additional effect. The safest item is not always the item with the largest number: it is the one that solves the current shortage without consuming something required by a recipe or task.
Use the inventory description as the current in-game authority. Captured community tables are useful for planning, but updates can change values. If a guide and the item description disagree, preserve the item, take a screenshot of the current description, and plan around what the installed build displays.
Weapons, armor, and the Forge progression
Combat progression is connected to farming and exploration. Weapons may be purchased, found, rewarded, or forged, while armor and accessories can require their own materials or unlocks. This makes a difficult fight a resource-routing problem as often as it is a leveling problem.
Molly's early task opens the Workshop and establishes the mining-to-Furnace-to-Forge loop. The Forge upgrade guide separates four stations players often mix together: the Forge for creating listed equipment, the Furnace for processing ore, the anvil's equipment-upgrade function, and the Lapidary Table route that unlocks that upgrade function. When a recipe does not appear, verify the station and unlock before gathering a second stack of materials.
Use this order when preparing for a harder area:
- Identify the enemy or boss and the problem in the previous attempt.
- Decide whether the problem was incoming damage, outgoing damage, MP supply, or access.
- Inspect equipment already available at the Forge and shops.
- Gather only the materials for the chosen item.
- Equip it and retest against the same target.
- Change one major factor at a time so the result is understandable.
This is more useful than crafting every visible item. A recipe list can contain sidegrades, equipment for another damage type, and entries copied from an older version. Some captured Forging data marks Verdite and later recipes as requiring a tier-two Forge while also warning that the page may be outdated. Treat those rows as a lead to verify in your own Forge menu, not as proof of a currently obtainable upgrade requirement.
Enemy difficulty and progression triggers
The available developer reply says there is not a general enemy-scaling system in which every opponent automatically follows the player. It describes many progression changes as being tied to major bosses, mainly those associated with Adrian's tasks. Those bosses can trigger new broadcasts, farm bosses, and particular enemies connected to later locations or events.
That creates three different reasons a fight can feel harder:
- A different enemy has appeared. The model, name, element, behavior, or location has changed after progression.
- The same route now includes a new event. A news or holiday state can place a special encounter in an otherwise familiar area.
- The loadout no longer fits. An enemy with different defense or elemental properties can punish a weapon that worked on the previous route.
Record the exact enemy and location when investigating a difficulty change. “The Mall got harder” is too broad; “a named enemy appeared in a back-office room after Tentacle Cleanup” can be compared with task and version evidence. The Adrian quest route is the better place to diagnose whether a boss-linked cleanup milestone has been completed.
Leveling still matters because fights award experience, but grinding is not a substitute for access items, equipment, or a suitable damage type. If several low-risk fights produce experience without making the blocked encounter meaningfully safer, stop and inspect the equipment path. The evidence specifically emphasizes gear as a major factor.
Combat Shrines and empowered enemies

Combat Shrine references indicate that enemies can be empowered and may gain additional drop opportunities. The captured item data links certain unusual rewards, including Voidberry Seeds, to enemies empowered by a Combat Shrine. That is enough to establish a risk-and-reward relationship, but not enough to publish one universal shrine table or promise a particular drop on every attempt.
Before using a shrine, separate the goals:
- If the goal is ordinary progression, test the area without empowerment first.
- If the goal is a shrine-linked drop, bring a loadout already proven against the normal version.
- If the goal is learning enemy weakness, do not combine the first test with a shrine modifier.
- If the shrine changes an enemy but the desired item does not appear, do not conclude that the item is guaranteed; chance and version differences may still apply.
Treat the shrine as an optional difficulty modifier unless a visible task explicitly requires it. Preserve a save before experimenting with a scarce item or a route that cannot be easily reset. The site does not claim an unverified shrine activation cost, duration, or drop percentage.
Decide whether to continue or reset
Do not wait for a defeat screen to decide that an attempt was unproductive. After the first few turns, compare the resources spent with the progress made. Continue when the enemy is losing HP at a sustainable rate, healing restores a meaningful margin, and the remaining MP supports the plan. Reset the route when basic attacks are ineffective, every turn requires recovery, or the fight consumes task items faster than it approaches completion.
“Reset” does not imply an undocumented flee command. It can mean reloading a preserved save, leaving before initiating the encounter, bathing and re-equipping, or returning after another unlock. Choose the option the current game state visibly permits. Do not assume every scripted boss can be escaped once combat begins.
For dungeon routes, include the return journey in the calculation. Winning with no HP, no MP, and no food can still leave the player stranded behind another enemy. A clean attempt reaches the objective and exits with enough resources to protect the items earned.
Diagnose a combat failure without guessing
| Symptom | Check first | Next safe action |
|---|---|---|
| Attack does very little | Equipped weapon, damage type, enemy weakness | Test a documented alternative or forge a targeted upgrade |
| Enemy damage is overwhelming | HP, armor, curses, allegiance penalty | Restore, clear harmful status, and compare defensive gear |
| Skill or ritual is unavailable | MP, unlock state, active equipment | Restore MP and confirm the ability is actually learned |
| Food cannot be found in battle | Inventory, item category, quantity | Verify the item exists before re-entering combat |
| Familiar area has a new threat | Recent boss, task, broadcast, festival | Identify the new enemy and progression milestone |
| Expected drop is missing | Exact enemy, shrine state, chance, version | Repeat only if the source establishes a chance-based drop |
| Workshop recipe is missing | Correct station, blueprint, Forge tier | Follow the forge unlock checks instead of farming blindly |
Change one variable between attempts. If you simultaneously change weapon, god allegiance, food, and shrine state, a win will not tell you which change mattered. A controlled retry gives a reusable answer for the next enemy of the same type.
Finally, distinguish an evidence gap from a bug. This guide does not invent exact hidden formulas, enemy scaling coefficients, retreat chances, or drop rates. When the game does not expose a value and captured sources disagree, the useful response is to document the observed build and keep the claim conditional. That approach makes a combat route slower to write but much safer to follow.
Editorial verification
This guide was source-checked on . Confirmed game details, community observations, older-build behavior, and unresolved evidence gaps are identified in the article instead of being presented as equally certain.
Found an outdated step or a version mismatch? Send a correction to Kevin.