
The main Welcome to Elderfield characters are Alice, Josh, Sam, Ellie, Edwin, Tanner, Molly, Blorph, and Celeste. All nine belong to the marriage roster, but they are only part of the town's cast. Hans runs the farm, Crawford sells its tools and seeds, and several other residents control the shops, keys, equipment, and investigations you need to progress.
If you need an upgrade or a quest hand-in, start with the person's job below. If you need a missing friend, use their home and nearby places as a search route. Residents have variable schedules, so a location list is not a promise that someone will stand in the same place every afternoon.
Welcome to Elderfield characters at a glance
| Character | Places to check | Useful connection |
|---|---|---|
| Alice | Left side of the Town West duplex; town and Mall Food Court | Brass Compass, friendship, Josh's school group |
| Josh | Right side of the Town West duplex; bus stops and town junctions | Fancy Key conversation, friendship, school invitation |
| Sam | Greystone Estates, first floor, Apartment 1; Lakefront and town | Seeker's Orb, Cryptic Note, Josh's school group |
| Ellie | Boarded-window house near the northwest bus stop; Library | Books and mysteries, Edwin's school group |
| Edwin | Lit-porch home left of the northwest bus stop; Mall entrance | Ancient Coin of Order, town history, school invitation |
| Tanner | Cabin to the right of the Old Woods entrance; outskirts | Farm introduction, Molly's workshop access |
| Molly | Workshop on the farm route | Forge, equipment upgrades, school invitation |
| Blorph | Sewers behind the northeast Police Station | Friendship and Edwin's school group |
| Celeste | Library; also check relevant town and school scenes | Friendship and Molly's school group |
Alice: compass, visits, and a shared address
Alice lives in the left unit of the duplex in Town West, with Josh occupying the other side. A shared address makes it easy to include both residents in a town visit. Her other recorded places include the Mall Food Court, the Farmhouse, and stops around town, so an empty home need not mean a quest has broken.
An introductory conversation with Alice gives the Brass Compass, making her worth meeting while you are learning your way around. She also has a later interaction involving a treasure map and a lamp. Treat that as a particular clue rather than a rule that every map can be solved under any lamp. For relationship progression, Alice belongs to Josh's school group and is one of the nine possible spouses.
Josh: phone clues and a school invitation
Josh lives in the right unit of the same Town West duplex. Town junctions, bus stops, and the playground are other places to check when he is away. His first meeting includes a Flask of the Gods, but this introductory present is not a daily supply of free flasks. Finish the conversation before leaving, especially when you have another active clue that involves him.
Josh is connected to the Fancy Key conversation in the Welcome to Elderfield phone guide. A phone puzzle and a friendship event can both involve him without sharing every prerequisite. He also sends the school invitation for the group containing himself, Sam, and Alice. The invitation can therefore concern Josh even if you have spent more time building friendship with one of his two companions.
Sam: the Seeker's Orb and a separate note puzzle
Sam's recorded home is Apartment 1 on the first floor of Greystone Estates. Outside it, check town, the Lakefront, the playground, and bus-stop areas rather than repeatedly entering the same apartment. Sam describes getting lost and recognizes a possible school connection with the player. The introductory gift is a Seeker's Orb.
That first meeting should not be confused with the Cryptic Note from Sam. Receiving an orb does not supply every password or establish that a later note has been completed. Sam also has story states that affect where you can find them, so look at your current task before following a general location list. For romance and school adventures, Sam is part of the same group as Josh and Alice.
Ellie: the library and the boarded-window house
Ellie's home is the run-down, boarded-window house beside the northwest bus stop, on its right side. The Library is another useful place to look, along with the Lakefront, General Store area, and playground. Her conversations include an interest in boarding buses without knowing the destination and searching for an unusual book with teeth and glowing eyes. Those details help distinguish Ellie from another resident encountered along the same road.
One introductory encounter provides Mystery Meat. Keep that separate from the later book conversation; having received a gift does not mean you have exhausted her dialogue or completed a library objective. Ellie belongs to Edwin's school group alongside Blorph. If you are choosing a spouse, she is also on the marriage roster rather than being restricted to a supporting quest role.
Edwin: history, a protective gift, and dreams
Look for Edwin's home in the left unit of the building on the left side of the northwest bus stop, with its porch light on. His town locations include the Mall entrance, Task Board area, and the route between the Sewers and Lakefront. His introductory conversation concerns Elderfield's history and its dangers. It provides an Ancient Coin of Order and opens a piece of the weather broadcast.
That makes Edwin useful to a player following the town's mysteries as well as someone pursuing friendship. Do not infer an equipment bonus from the gift's name; inspect the item's actual description before changing your loadout. Edwin sends the school invitation involving himself, Ellie, and Blorph. Its starting premise involves crying in his dreams, so it is a distinct story from Josh's letter or Molly's missing-student investigation.
Tanner: the route into farming and Molly's workshop
Tanner points you toward the farm west of town when you first need work. His cabin is to the right of the Old Woods entrance, and other places to check include the outskirts and several town shops or bus stops. He is more than a name on a friendship list: speaking to him is part of opening your early equipment route. If the workshop door is stopping you, start with his available conversation.
An older Lost Gameboy requirement was removed; you should not spend your opening days searching for that obsolete prerequisite. Tanner's newer dialogue opens access to Molly, who then gives the copper-ore task. He also belongs to Molly's school group alongside Celeste. Once the door is open, the ore delivery and Forge introduction belong to Molly's progression, not to repeated conversations with Tanner.
Molly: the Forge and the first mining task
Molly's Workshop sits on the route toward the farm. She provides a Rusty Pickaxe and asks for one Copper Ore from the nearby Beginner Mine. Deliver the ore, then follow the workshop introduction to unlock the Forge and obtain the Furnace and its recipe. Merely owning the pickaxe is not the same as finishing this introduction.
Molly is the right person to visit when equipment progression stalls, including the Welcome to Elderfield axe upgrade. The Forge, the placeable Furnace, and the farm's Workbench have different uses, so check which station your recipe requires. Her friendship story is separate from these practical services. She sends the school invitation for herself, Tanner, and Celeste, and she can also be chosen as a spouse.
Blorph: a resident beyond the main streets
Blorph is associated with the Sewers behind the Police Station in northeast town. If you have only searched shops and houses along the main road, that is the first place to add to your route. The name appears among both the main relationship characters and the marriage candidates. Blorph also belongs to Edwin's school group with Ellie.
A sewer address does not tell you which gates or keys every part of that area requires. Follow the entrance you can actually reach, and distinguish a missing resident from a locked passage farther inside. Check the conversation name before beginning an interaction, especially while exploring the sewer passages for several different tasks.
Celeste: the Library and Molly's school group
The Library is the main place to begin looking for Celeste. Recorded appearances also involve Greystone Estates and school-related travel, so avoid treating the Library association as a guarantee of a single permanent tile. Check your active story before deciding that an empty library is a disappearance. Check the Library first, then the active school task and the other recorded locations.
Celeste is one of the nine marriage candidates and belongs to Molly's school group with Tanner. That puts the friendship route alongside a missing-student story, rather than making Celeste a prerequisite for unlocking Molly's Forge. You can use the romance and marriage guide for the shared relationship rules. Keeping service unlocks and personal events separate makes it easier to identify the next conversation you actually need.
The NPC to visit for each job
Hans, Crawford, and Elroy: three different farm roles
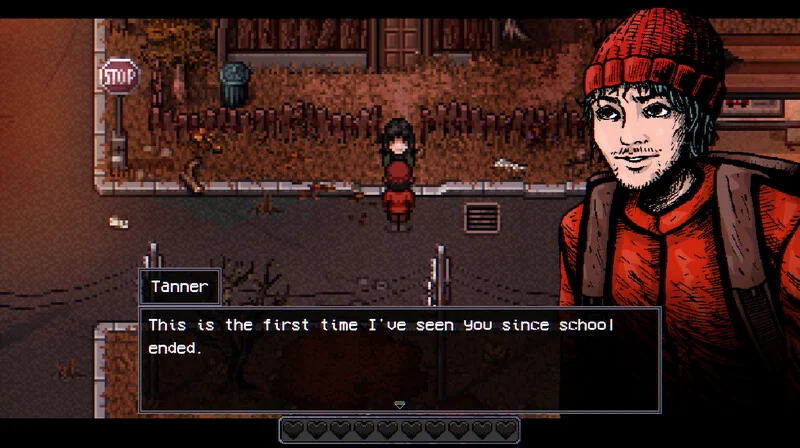
Farmer Hans is the enormous skeletal resident inside the Farmhouse. He gives permission to work the farm and starts the wheat task that leads into later seed unlocks. Billy Crawford, also called Old Man Crawford, is the former farmhand who sells tools and seeds. Chef Elroy is the cook whose recipe shop opens through Hans's progression.
Visit the right person after a reward: new seed stock belongs at Crawford's shop, while new food recipes belong at Elroy's. A task unlocking a recipe for sale does not mean the recipe has automatically been learned. The Hans tasks and seed guide follows these hand-ins in detail. The neighboring ranch is another service area, and its opening letter should not be confused with a new stock item at either farm shop.
Herb and Dave: fish lessons versus a food delivery
Herb is the fisherman at the Lakefront. He introduces the Old Fishing Rod, bait, and the basic Ghost Flounder task, making him the place to begin the fishing tutorial. Dave is the cat living near the player's house. Dave's Fog Broth request is a different job and leads to the Preserving Barrel reward.
These two conversations connect, but their requested fish are not interchangeable. Herb's introductory Ghost Flounder and the Fog Eel involved in Dave's food route are different catches. Before cooking or submitting your last fish, read the active request and reserve the appropriate ingredient. Dave's house also contains a password-door mystery; finishing the food order should not be assumed to solve that separate lock.
Dayton, the Gatekeeper, and Jackson: different kinds of mysteries
Professor Dayton is the Historical Society's head researcher, found in the Library study. He is the person to consult about the Stone Tower near the farm. The Gatekeeper is a Sewers character whose progression involves Pizza and three Gate Keys. A normal Skeleton Key does not replace those named quest keys.
Old Man Jackson gives the Build-A-Wife task involving a coat rack and assembled parts. Despite the name, that project is separate from the player's marriage system. His house also has a room associated with a Basic Skeleton Key, which is another reason to identify a lock before spending a key. The Skeleton Key guide explains that distinction and the consequences of using the consumable version.
Investigators, clubs, and recurring visitors
Akira is associated with the apartment building and the Time to Investigate task, which tracks solved mysteries. Adrian's longer cleanup jobs lead toward later exploration, including tasks involving tentacles, branches, and bones. Michelle and Barry connect to campsite and club progression. Talk to the named quest giver after completing an objective, because defeating something or obtaining an item is not always the final reward step.
The Tax Man visits the farm with crop demands, while the Travelling Merchant buys requested produce on weekend visits. Keep some crops available when you have an outstanding request rather than treating every harvest as immediate sale stock. The Garbage Man sells items in the Sewers and describes a Monday-and-Thursday restock schedule for that shop. That statement does not establish the reset schedule of every bin, mine, or other shop in town.
Pumpkid's quest choice has a real consequence
The babysitting route and helping Pumpkid with his prank are mutually exclusive. Helping with the prank can fail the task to return him to his parents; returning him blocks the prank route instead. A failed entry after that decision is therefore not automatically a damaged save. Choose according to the story you want to follow rather than expecting both paths to remain available in one sequence.
There is also a separate issue in which Pumpkid takes too long to return during a delivery. That delay was acknowledged after release, and it should not be treated as proof that you chose the wrong branch. If the character disappears during a hand-in, note the exact stage and preserve a save before experimenting. Repeating the opposite branch is not a reliable repair for a delay that occurs after the choice has already been made.
Finding a missing character without chasing an exact timetable
Start at the character's home or main service location, then try the nearby public places listed above. Weather, time, and story state can affect whether a resident is at home, outdoors, or elsewhere, and schedules include random variation. Rain is a reason to check a home, not a guarantee that every resident follows the same rule. If you are waiting for a specific event, read the home journal before making another circuit.
For a task-related disappearance, separate four things: receiving a letter, accepting its request, performing the objective, and returning for the reward. A journal entry can tell you which of these still needs attention. That check is especially valuable when you have completed combat but the person has not offered the expected key or stock unlock. It also avoids spending gifts on a friendship level when the actual obstacle is an unfinished task conversation.
Social records and choosing gifts
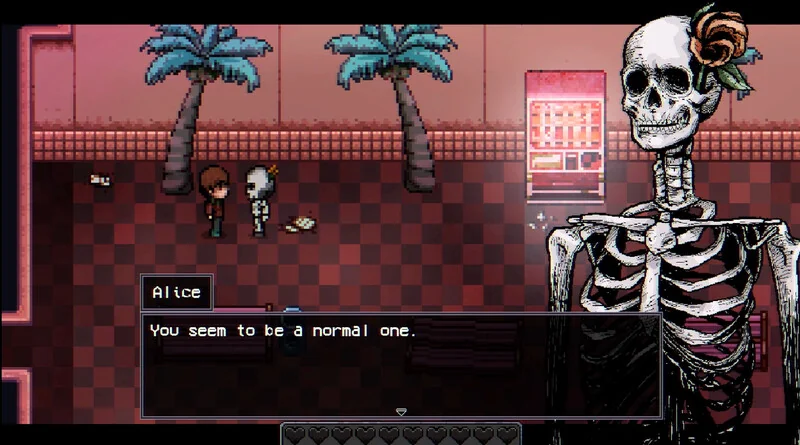
Use the Social menu to track gifts you have tried and the recipient's response. Gift preferences have changed, and an empty record can reflect gifts given before tracking was introduced rather than a completely new relationship. The first neutral, liked, or loved gift can award additional friendship, so different safe gifts may be useful. There is no dependable universal present on this page that overrides every character's individual reaction.
You can build relationships with several people, but marriage is limited to one partner. The normal gift allowance is also separate from that marriage limit; giving to many residents does not mean unlimited gifts to the same person. Keep a gift opportunity free when planning a proposal. The Ring of Binding and wedding steps cover the crafting chain, proposal check, and move-in timing for your chosen partner.
Back to top